Photoshop作为一款修图、制图软件,丰富的滤镜、素材为用户提供诸多便利,它也有很多画笔的图案可以使用,但有时候它提供的画笔图案里没有我们需要的,怎么办呢?这时我们就可以制定一个,那么,下面就由小编来教大家Photoshop定义画笔预设的方法。
方法步骤
1、首先打开Photoshop软件,并新建一个图层。
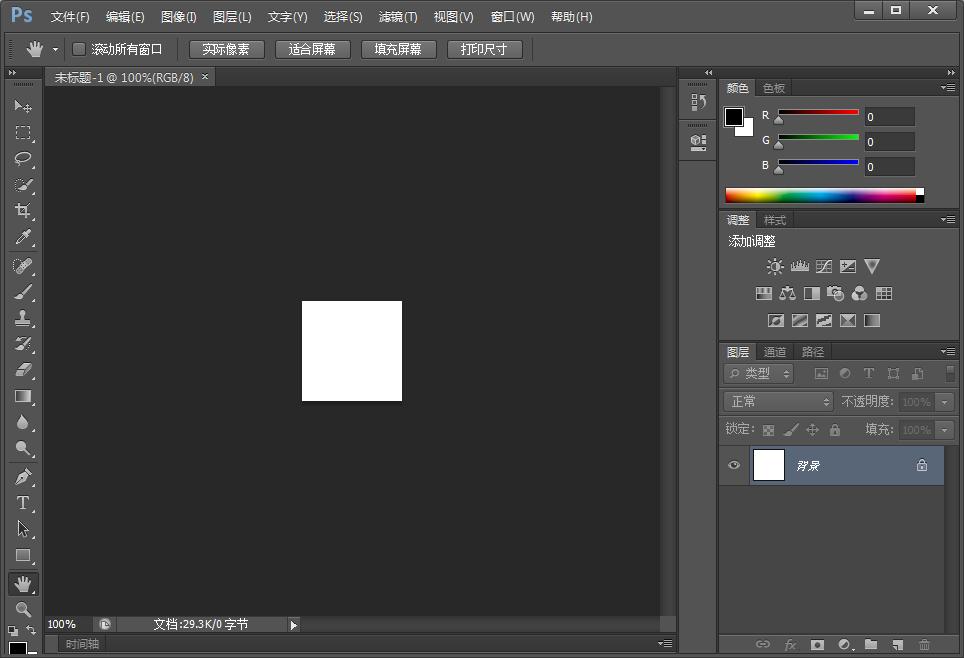
2、点击“画笔”,在图层上画出需要的图案。
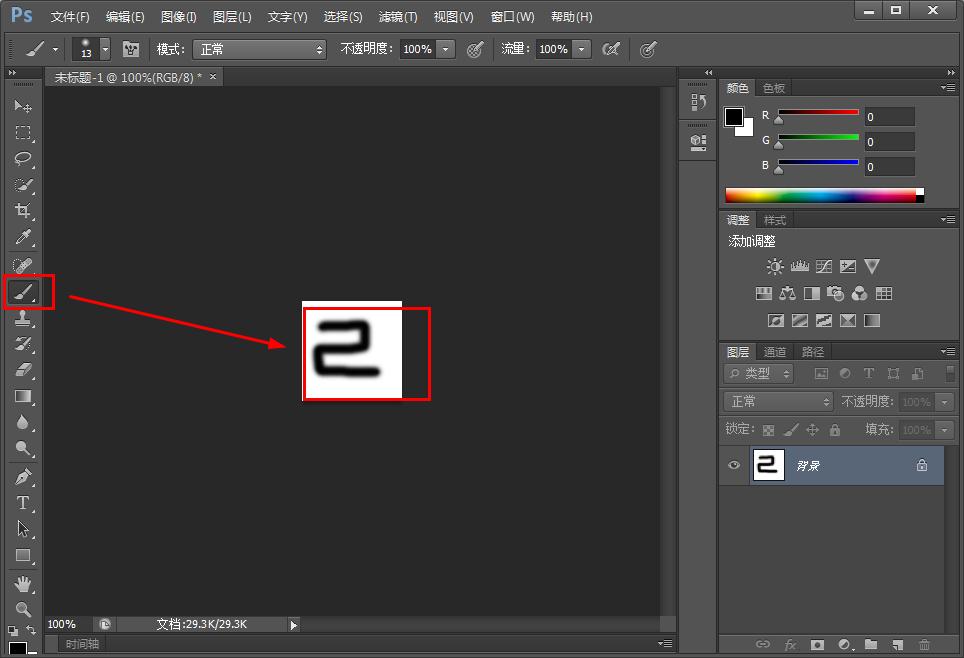
3、然后点击“编辑”,选择下面的“定义画笔预设”。

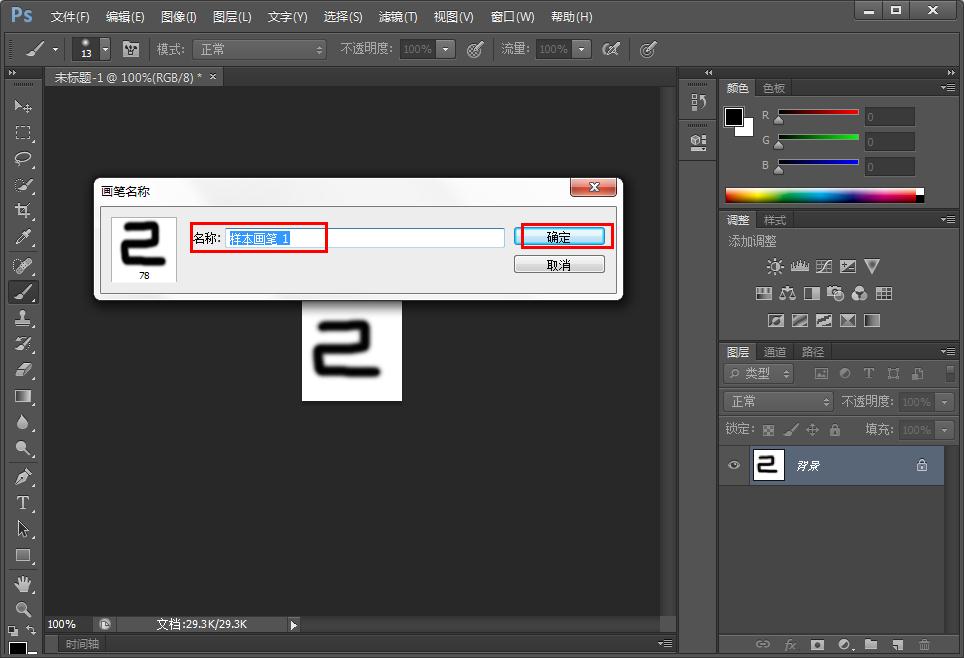
4、可以更改画笔的名称,再点击“确定”。
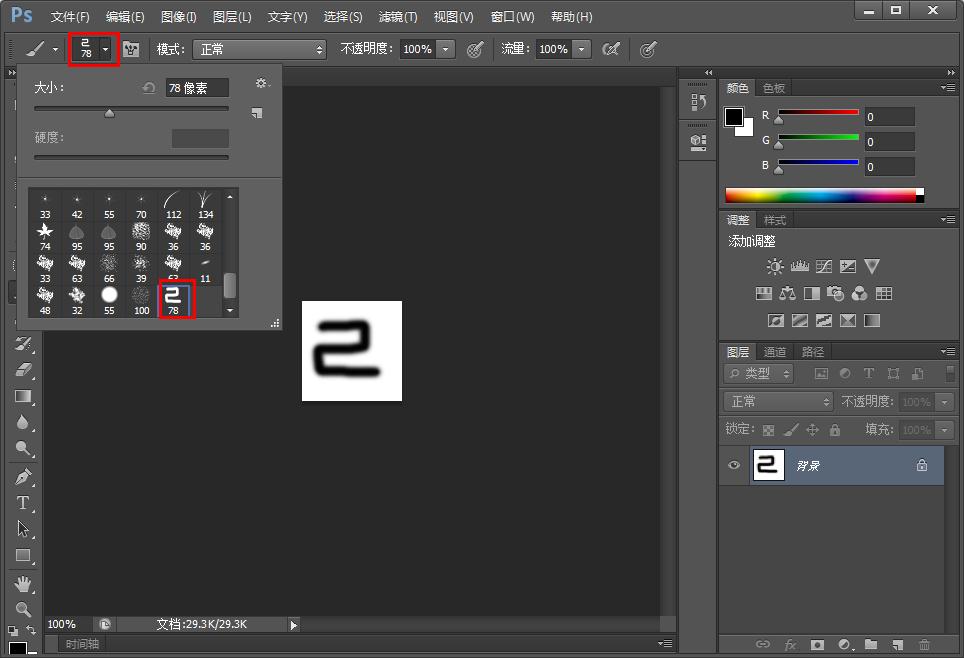
5、最后就可以在画笔的参考栏里找到定义的画笔。
Photoshop作为一款修图、制图软件,丰富的滤镜、素材为用户提供诸多便利,它也有很多画笔的图案可以使用,但有时候它提供的画笔图案里没有我们需要的,怎么办呢?这时我们就可以制定一个,那么,下面就由小编来教大家Photoshop定义画笔预设的方法。
Photoshop作为一款修图、制图软件,丰富的滤镜、素材为用户提供诸多便利,它也有很多画笔的图案可以使用,但有时候它提供的画笔图案里没有我们需要的,怎么办呢?这时我们就可以制定一个,那么,下面就由小编来教大家Photoshop定义画笔预设的方法。
方法步骤
1、首先打开Photoshop软件,并新建一个图层。
2、点击“画笔”,在图层上画出需要的图案。
3、然后点击“编辑”,选择下面的“定义画笔预设”。
4、可以更改画笔的名称,再点击“确定”。
5、最后就可以在画笔的参考栏里找到定义的画笔。